
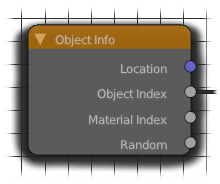
Now before you ignore me, I’m not talking about compositing here. I’m talking about the Object Index output of the Object Info material node:
The cool thing about this is that if you give a whole bunch of objects a single material, then you can still vary the material for each object by using the Object or Material index:
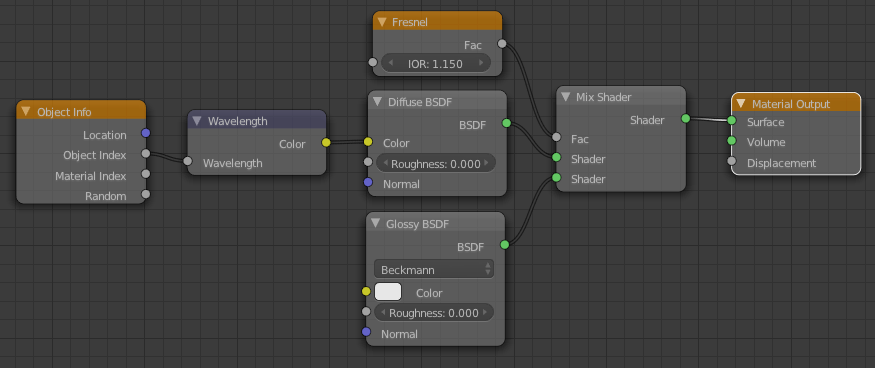
In the image at the top, I used a little bit of python to give each selected object a random index inside a certain range:
import random
for obj in bpycontext.selected_objects:
    obj.pass_index=int(random.random()*(640-440)+440)
The range (between 440 and 640) is actually the range of colours in wavelengths. So plugging that into the wavelength node will give me a random colour for every object:
But we could do that with the Random output of the same node, albeit with less control, so here’s an even better example:
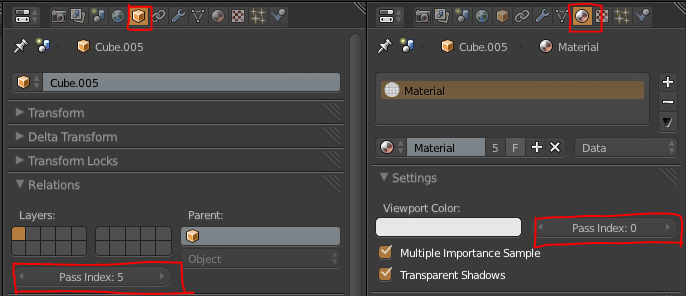
When you have a bunch of objects using the same material and you only want to change one of those objects, for example scale the texture up or down, you can use that object’s index as a mask and mix two things together with it. In the case below, making the object that has a pass index of 5 use tighter textures:
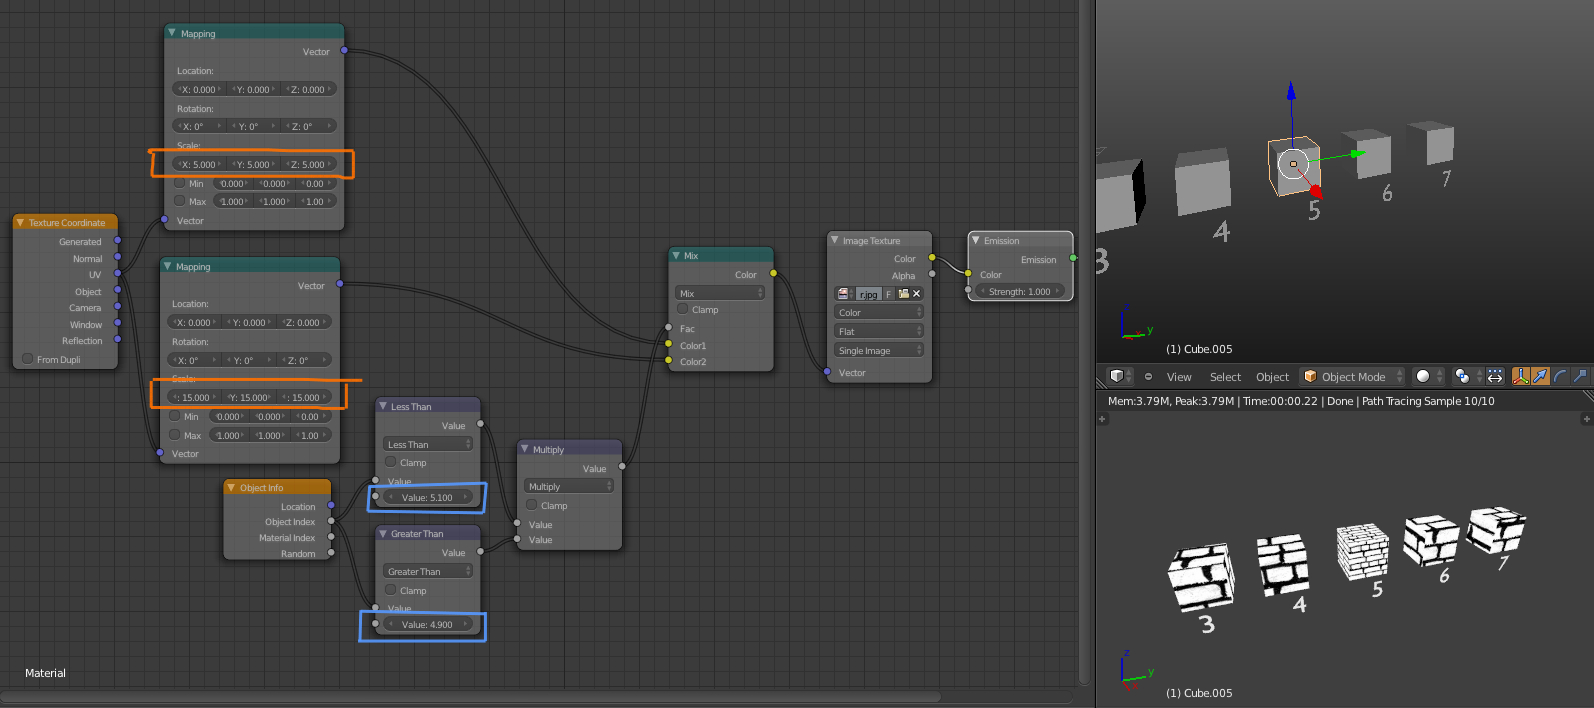 Since we currently lack an “Equal To” mode for the math node, we need to use the product of Less Than and Greater Than modes. The object index is an integer, so using 5.1 and 4.9 for those nodes respectively we can be sure that we’re only getting the index of 5.0
Optimization Tip:
The mapping node’s Scale ability is really just multiplying the UVs (which is really just an ‘image’ where red and green represent X and Y coordinates, plug the UVs into an a shader’s colour if you don’t believe me). So instead of using two mapping nodes in the example above, use a Colour Mix node on Multiply with the same scaling values for the R, G and B and use the Object Index for it’s Fac.
hi this is a very awesome idea to create simple hue variation of a stone tile texture or for tile roof. But i’m not good with python…not at all…where do i need to write the code? i’ve tryied in the python console but nothing happened
Hey Alan, the Python Console is one of blenders editors – you can just change any editor to it the usual way you’d switch to the UV Image Editor or Node Editor, only this time choose the Python Console (right at the top/bottom of the list)
Or just change the screen layout to Scripting and you’ll see it at the bottom: https://dl.dropbox.com/u/23382946/Screenshots/2013-07-31_17-43-29.jpg
oh thanks but that’s not what i meant :) i know how to get access to the console…but i’ve done my objects selection, paste the code you wrote up here to assign random mat.index in the python console but nothing happens!
Ah sorry, type ‘import random’ first before running it, and perhaps replace ‘C.selected…’ with ‘bpy.context.selected…’ just for good measure
Nice tip, indeed. And very nice blog, which I just discovered btw!
Another way to do the coloring without using the python console could be to use the random port in the Object Info node. It gives a random number between 0 and 1 which could easily be manipulated with the math nodes to a number in the correct wave length range.
The sphere image looks great I think, can you share the environment image, or the source of it?
Indeed we could ;) “But we could do that with the Random output of the same node, albeit with less control, so here’s an even better example…”
I don’t recall exactly which image I used, but I get most of mine from openfootage.net
Doh, my mistake ;).
Thanks for the link to openfootage, I’ll look there. And try to read the post more thoroughly next time…
hi, sorry i’m not good in python (and my english is bad)
i have run your script and it fail :'(
the console feedback is :
>>> import random
>>> for obj in bpycontext.selected_objects:
… obj.pass_index=int(random.random()*(640-440)+440)
Traceback (most recent call last):
File “/usr/lib/python3.3/code.py”, line 63, in runsource
code = self.compile(source, filename, symbol)
File “/usr/lib/python3.3/codeop.py”, line 168, in __call__
return _maybe_compile(self.compiler, source, filename, symbol)
File “/usr/lib/python3.3/codeop.py”, line 99, in _maybe_compile
raise err1
File “/usr/lib/python3.3/codeop.py”, line 87, in _maybe_compile
code1 = compiler(source + “n”, filename, symbol)
File “/usr/lib/python3.3/codeop.py”, line 133, in __call__
codeob = compile(source, filename, symbol, self.flags, 1)
File “”, line 2
obj.pass_index=int(random.random()*(640-440)+440)
^
IndentationError: expected an indented block
Python relies on tabs indents (4 spaces) to figure out whats in what loop/statement/function. You need to press tab or added four spaces before the line obj.pass_index=in…
ok i try it again and console say:
File “”, line 1, in
NameError: name ‘bpycontext’ is not defined
°~°’
ok after 3 retry it work with bpy.context.selected_objects great!!
thx a lot for the reply man !
it’s so cool
This is FANTASTIC. I thought I had run into something I just couldn’t do in Blender.
I’m using Animation Nodes and I needed to set a per-object value that was usable in a Cycles material. Cycles’ Attribute node doesn’t support custom properties, and the properties it does support can’t be controlled from AN on a per-object basis.
But this solves just about everything. I can set the Pass Index from AN, it’s per-object even for instanced objects, and I can use it in a Cycles material.
Super helpful and thank you for sharing! I updated the Python script to work with Blender 2.8+ (Thank God. I hardly know Python). It seems to work and I get no errors, but please correct if this is wrong:
import bpy
import random
selectedObjs = bpy.context.selected_objects
for obj in selectedObjs:
obj.pass_index=int(random.random()*(640-440)+440)